How To: Safety Pin Your Life Together
So while you guys were doing drunk millennials things this Saturday, I was a wholesome human being. Wait, who am I kidding? My fashion and I were never wholesome to begin with.
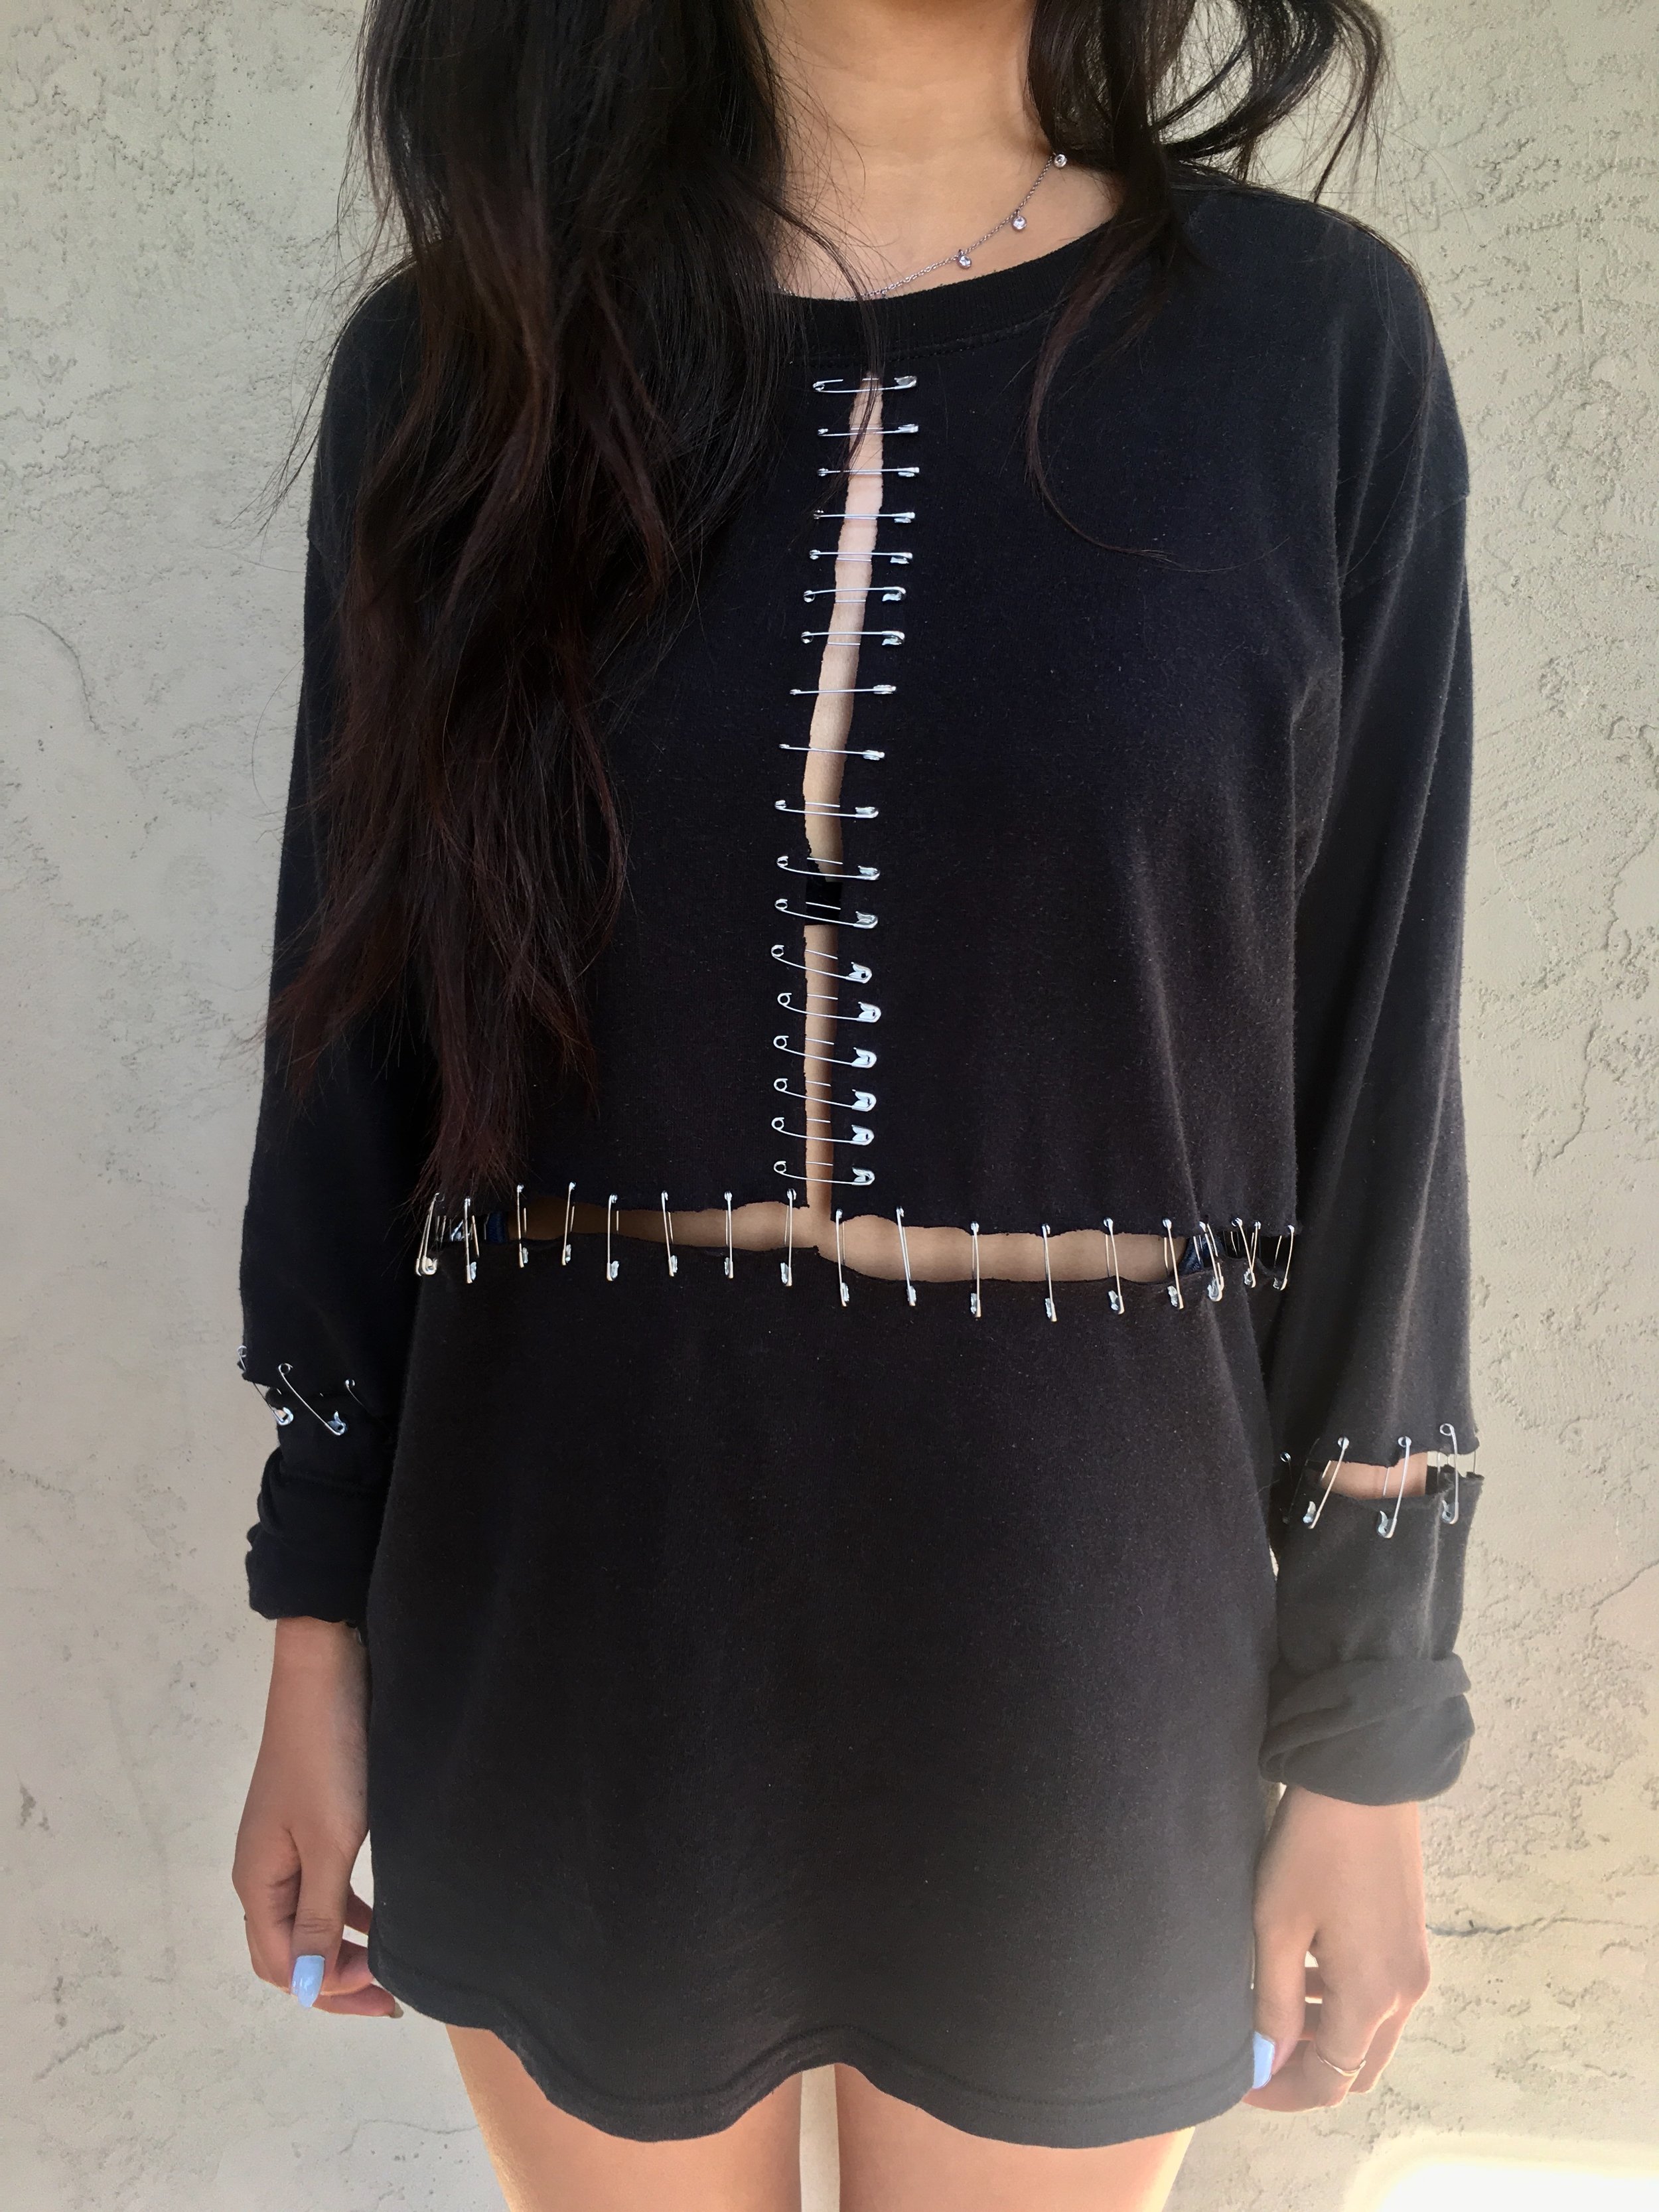
Today, I am going to show you how I revamped a boring shirt. If you have already scissored all your old tees, just stop by one of the many consignment or thrift stores in Berkeley (Don’t worry! Your home girl linked it).
So while your life is falling apart, your shirts can too. Common sense!
What will I need?
For all you broke college students out there like me, here's the cost rundown:
thrift store shirt = $3
safety pins = $2
I'm not sure about you, but I would call that a win. Now, where do I buy this and how far do I need to walk?
Shirt
Thrift stores (cheapest option if not your closet):
Consignment stores (a lil’ more expensive):
Safety Pins
If you would like larger safety pins, look for quilter pins, which are sold at craft or fabric stores! If you already shuddered at the thought of walking, here are your Amazon options.
Okay, how do I make this look decent?
Cut wherever you find pleasing; I chose to slice my shirt with these measurements:
Cut a twelve-inch vertical line from the center of the neckline down. Alternatively, if your shirt is smaller, cut about halfway down the length of the shirt. From the end of the vertical slice, cut horizontally across the width of the shirt. Repeat the horizontal cuts on the sleeves.
Tips before your life actually tips
The safety pins lie about one inch apart from one another. If you are looking for a minimalist look, feel free to create more separation between the pins. Make sure to insert all of the pins in the same direction. To begin, insert the pins on the left and right sides, making it more difficult to misalign the pins.
Good luck! Don’t stab yourself with the pins; I’m not talking from personal experience. Now if you don't mind, I need a Band-Aid.
Words By Garb


